


Flexx MTB Handlebar Factory-Fresh Kit
- Flat Rate Shipping
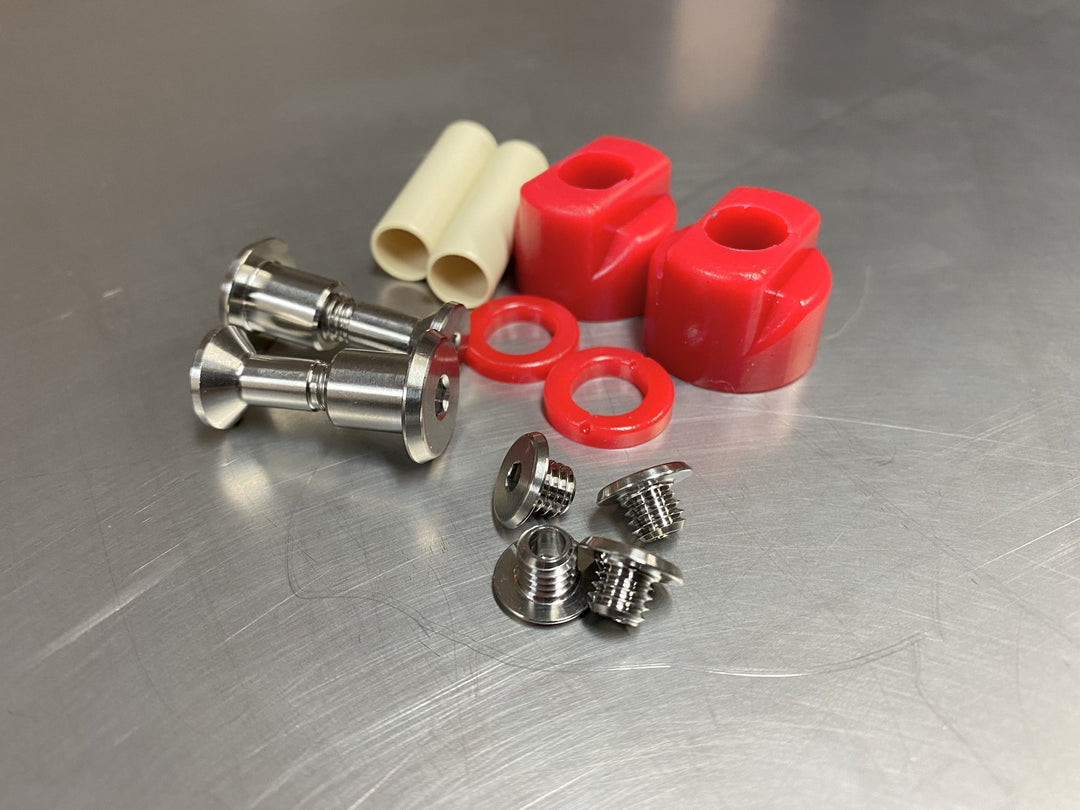
Our Factory Fresh kits create an easy way to service your Flexx MTB Handlebar. This kit provides you with all of the necessary parts to perform the service. The Factory Fresh Kit contains contains:
2 bolts, 2 nuts, 4 pin end caps, 1 set of igus bushings for the pivot pins, and your choice of Rebound and Compression Elastomers.
Just like your suspension, elastomers do need to be freshened up. We recommend changing your elastomers yearly to be sure your Flexx Handlebars are performing as intended.
Smaller riders, or those riding mellow trails (or gravel grinding) usually prefer the blue or yellow compression elastomer. The red elastomers are harder and provide a more traditional feel. The black elastomers are extra hard, mostly reserved for larger, more aggressive down hill riders. It's mostly personal preference, and with a little testing you can quickly tailor the bar to your needs. We're happy to discuss your elastomer combination with you to be sure you're getting the most out of the Flexx Handlebar, please shoot us a call or email to do so.
Soft - Blue
Medium - Yellow
Hard - Red
Extra Hard - Black
Features
1. All-inclusive kit
Read the steps necessary and watch our video under the Service tab above, to install your Factory Fresh kit yourself.
3. What's in the box
The Factory Fresh Kit contains contains 2 bolts, 2 nuts, 4 pin end caps, 2 sets of igus bushings for the pivot pin, and your choice of Rebound and Compression Elastomers.
How to service your Flexx MTB Handlebars
Proper Handle Resistance
Your handles may have some drag or resistance when the elastomer is removed. The drag is caused by the exacting tolerance required for the Flexx Handlebar to offer the utmost in control and reliability. Flexx Handlebar pivot points are most likely the most exacting tolerance on your entire machine and must be so. Too large of a tolerance will not the yield the precise control you as a rider require to perform at your best. It is not only acceptable but preferred to have some drag on the handles. Each side of every Flexx Handlebar System is measured with a strain gauge to be sure the resistance of each handle is within our tolerance. If your bar rebounds to its present ride height after being compressed you should be good to go. If you have any questions concerning this please contact us.The Step by Step Service Process
Two key things to remember
1) Do not mix the pivot pins up. The left pin needs to go back in the left hole, and the right pin in the right hole. We separate our pins and hone our pivot holes to .0001 of an inch. It is crucial to have proper fitment of each pin so there is not front to back play.Tools Required
- 4mm Allen Wrench - To change elastomers
- 3mm Allen Wrench - To remove pin end caps if necessary
- Blue Loctite
- Remove the elastomer nuts and bolts, then remove the elastomers.
- Remove the pin end caps with a 3mm allen.
- Now drive the pins completely out. Again, use a M6x1.0 bolt to protect the pin.
- With pins out you can press the pivot bushings out of the bore. A long 6mm socket can typically be used.
- Clean pivot bores and pins.
- Place the pivot pin in the back side of the bar, square to the bore. You will know the pin is square to the bore when it will not rock easily up, down, or to the side without applying force.
- Align the handle bore with the center section bore then press the pivot bushing through both components.
- Protecting the pivot pin with the m6x1.0 bolt threaded into it, tap the pivot pin all the way through the bore flush with the other end.
- Install the pin end caps, use red Loc-tite on both the male and female threads. Torque the pin end caps to 4nm with a 3mm allen.
- Install the compression elastomer. Butt the 45* relief in the narrower part of the elastomer up against the handle.
- Install the rebound elastomer on the nut.
- Apply red Loc-tite to the threads of both the bolt and nut. Only use the torx head to hold the bolt when turning the 4mm nut. The bolt will bottom out in nut, bring the handle to 5* up-sweep.